Did you ever think about displaying a
40x60 or large French sheet (47x63)?
Do you know what framing costs would be??
Can anyone say '2nd mortgage'?
For an inexpensive way to display larger
posters we used the shrink-wrap method.
We had to devise a way to display large
posters inexpensively and showcase them in the store as well. Here's what
you can do.. Go to your nearest framing supply house and look for a sheet
of acid free backing board (white). The larger size normally comes in
a sheet 48" x 96".
Next, go to a commercial frame shop or
anyone who does shrink-wrapping. You want a piece of doubled shrink-wrap
(this means they put the item to be shrink-wrapped in-between them and
seal it.) at least 28-36 inches wide and about a foot longer than your
poster (you might want to get a couple or there are several places that
you can buy a roll).
Trim your backing board where it's ½"
to 1" larger on each side of your poster to give a border look. Take
little pieces of acid free tape and tack down your poster in major points,
centering it on your board. Start from one end and work to the other smoothing
it as you go. Be sure to have all the wrinkles out and smoothed down with
NO dirt or dust on it.
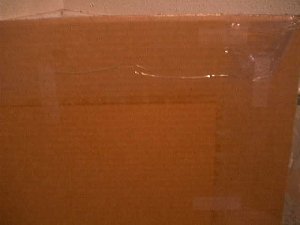
Next carefully lay your board on a table
or combination of tables so the edges of the board hang over and you can
get to the back side edges of your board.
Very carefully unfold the poster and center
the shrink-wrap over your poster and easily brush out the shrink-wrap.
Make sure that there are NO dust particles under the shrink-wrap or they
will show up later.
Next take regular tape and tack the shrink-wrap
edges to the back of the board about every 6 inches. The easiest way is
to go down one side tacking the back, then go to the opposite side where
you can tighten it a little as you go and tack that side down.
Then go to the end and fold the corner under and tack it down the same
and then finally to the opposite end, pulling slightly to tighten the
shrink-wrap and tack it down.
Once you've tacked the shrink-wrap to
the back on your board, your poster is encased on the board. Next, gently
take the encased poster and turn it over with the back side of the board
face up on your table.
Take a roll of clear packing tape, the
3" wide is better, and go down with a long strip sealing the shrink-wrap
to the board. You don't want any air to get out between the shrink-wrap
and the board. Ok we're almost through.
This is the final step and has to be done
VERY CAREFULLY. Your board should be able to be stood up on end now with
your poster encased on it. Go get your hairdryer. Put it on low heat and
stay about 8-12 inches away from the board. Move it back and forth so
you're not staying in one spot and you'll notice the shrink wrap starting
to 'shrink' and tighten to the poster.
BE VERY CAREFUL NOT TO POP THE SHRINK-WRAP.
If you do you have to take all the shrink-wrap off, get another piece
of shrink-wrap and start all over.
The best thing is to start on the back
side that doesn't show to practice on. If you pop a little hole then it
doesn't matter as much.
Once you've gone all the way around on the back side then move to the
front. Slowly move to different sections of the poster, moving as soon
as you see it tighten where there are no more wrinkles. When you've finished
it looks like you have glass on the top of your poster.
Next go to a hardware store and look for
a pack of mirror holders. They are small 'L' shaped holders that come
in a set with a screw for each that holds the mirror onto the dresser.
You can look for fancy ones with scrolls or whatever you like.
You can use these to put your shrink-wrapped poster on the wall and looks
a lot nicer.
So for under $20 you can TEMPORARILY display
your large poster for everyone to see.
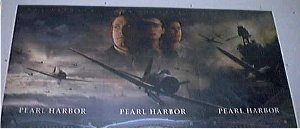
'this is a set of 3 one
sheets from the movie 'Pearl Harbor' that we shrink-wrapped side by side
on one board for a display'